
3 Best Lean-To Polycarbonate Greenhouse Kits Australia – Year-Round Growing in Tight Spaces
Side yards and narrow patios don’t have to kill your growing season. A lean-to polycarbonate greenhouse turns a warm wall into a productive microclimate, keeps frost off tomatoes, and stops coastal wind shredding your seedlings — without swallowing the whole backyard.
Quick Picks
Best Overall: 6×4 aluminium lean‑to with twin‑wall polycarbonate – stable, easy to anchor, good Aussie heat insulation
Best Budget: Compact 4×2 wall greenhouse – fits terraces and units, simple assembly, great for herbs and starts
Best Premium: Heavy‑duty 8×4 lean‑to – thicker panels, stronger bracing for wind‑exposed sites and winter cropping
Planning full climate control? Compare fans and auto vents in our greenhouse ventilation guide. For larger builds, see turnkey polycarbonate packages.

Lean-to Greenhouse Aluminium Frame Polycarbonate Panels Garden Plant House Ventilation System Lockable Door Integrated Drainage Gutter Adjustable Roof Vents Year-Round Gardening Outdoor Shade
$358.99 on Amazon
Costway Mini Lean-to Walk-in Greenhouse W/ Flower Rack, 199 x 98 x 215cm Portable Wall Green House W/ Weatherproof PE Cover, Roll-up Zipper Doors, Wind-Proof Outdoor Greenhouse for Seedling & Pot
$79.95 on Amazon
ALFORDSON Walk-in Greenhouse Alum PC Vent & Sliding Door, 2.5x1.9x1.8m
$379.95 on AmazonBest Overall – 6×4 Aluminium Lean‑To, Twin‑Wall Polycarbonate
Why it stands out: The 6×4 footprint hits the sweet spot for Aussie homes: enough benching for a couple of tomato tubs, propagation trays, and a citrus in a half wine barrel, yet small enough to anchor neatly against brick. Twin‑wall polycarbonate (typically 4–6 mm) insulates better than single‑skin, softens harsh summer sun, and shrugs off hail better than glass.
Real‑world use case: North‑ or north‑east‑facing wall in Sydney/Perth/Melbourne for autumn seedlings and winter salad greens. Open the roof vent and door on 35°C days; close up with a shade panel for late‑summer propagation.
- Pros: Good heat retention for shoulder seasons; light, rust‑free aluminium; easy to gutter into a small rainwater tank; works with auto‑vent openers.
- Cons: Twin‑wall can rattle if not taped/sealed properly; limited headroom at the rear if wall flashing isn’t planned; standard kits often include light‑duty anchors you’ll likely upgrade.
Best for: Most suburban buyers wanting reliable season extension without major construction.
Who should avoid: Homes in very exposed coastal or hilltop sites where higher bracing and thicker panels (or a full‑height freestanding house) are a better bet.
Best Budget – Compact 4×2 Wall Greenhouse
Why it stands out: Minimal footprint for terraces and unit courtyards. Still gives you stable temperatures for basil, chilli, and seed trays while keeping snails and wind out. Quick weekend build with basic tools.
Real‑world use case: Morning sun on a townhouse patio in Brisbane or Adelaide; keeps rain off potting soil and doubles as tidy storage for propagation gear.
- Pros: Lowest entry price; lightweight panels that are simple to handle; fast warm‑up after cool nights.
- Cons: Can overheat quickly on high‑UV days; less room for tall crops; budget frames need careful squaring and extra fixings into masonry.
Best for: Beginners and renters who want a first greenhouse without eating the whole deck.
Who should avoid: Growers chasing winter tomatoes or needing space for fruiting tubs and full bench runs — go 6×4 or larger.
Best Premium – Heavy‑Duty 8×4 Lean‑To with Thicker Polycarbonate
Why it stands out: More bracing, sturdier profiles, and thicker polycarbonate (often 6–10 mm on premium kits) smooth out temperature swings and shrug off gusty fronts. The extra headroom makes trellising cukes and indeterminate tomatoes realistic.
Real‑world use case: Wind‑prone Hobart or coastal NSW site that needs a solid anchor footprint and room for winter greens plus an autumn tomato experiment.
- Pros: Better thermal stability; more usable space for shelving and tubs; typically includes improved door hardware and vents.
- Cons: Higher cost; heavier to maneuver on install; may require additional wall flashing or custom sealing for a clean weatherproof join.
Best for: Enthusiasts upgrading from a mini‑house, or anyone replacing a tired PVC tunnel with something long‑term.
Who should avoid: Very tight courtyards where door swing and walkway clearance are constrained.
Lean‑To Greenhouse Comparison at a Glance
| Product Type | Best Use Case | Main Advantage | Main Limitation |
|---|---|---|---|
| 4×2 Compact Lean‑To | Small patios, herbs, seed starting | Lowest cost, fastest warm‑up | Limited height and crop volume |
| 6×4 Twin‑Wall Lean‑To | General backyard growing, propagation + tubs | Balanced space, insulation, and price | Needs proper sealing to stop panel rattle |
| 8×4 Heavy‑Duty Lean‑To | Wind‑exposed sites, winter cropping | Stronger frame, thicker panels | Higher cost, heavier install |
How to Choose a Lean‑To Polycarbonate Greenhouse in Australia
Panel thickness and type
- 4 mm twin‑wall is fine for seed starting and shoulder seasons in mild zones.
- 6–10 mm twin‑wall stabilises temps better for southern winters and hot northern days.
- Ensure UV‑stabilised panels rated for our sun; inferior sheets can yellow or embrittle.
Frame and hardware
- Powder‑coated aluminium is the go for coastal corrosion resistance.
- Prefer bolted bracing over thin clip‑together frames if you get summer storms.
Ventilation and shade
- At least one roof vent plus the door; auto‑openers prevent heat spikes when you’re at work.
- Plan removable shade cloth for December–February, especially north/west walls. See our shade & light control guide.
Anchoring and sealing
- Anchor the base into concrete, pavers in mortar, or brick; avoid raw soil.
- Use masonry anchors, wall flashing or foam backer rod, and UV‑safe sealant to stop leaks and rattles.
Orientation and site
- In most of Australia, a north or north‑east wall gives best winter sun; eastern exposure is kinder in summer heat.
- Allow door swing and 600–800 mm of internal aisle for comfort.
Compliance
- Check local council for minor structure rules and boundary setbacks, especially on narrow side easements.
Installation Tips from the Field
- Square it first: Dry‑fit the frame and check diagonals before fixing to the wall; it stops panel gaps later.
- Seal panel ends: Use vented anti‑dust tape at the bottom and solid tape at the top of twin‑wall sheets.
- Gutter to a tank: Lean‑tos collect clean water; a slimline tank plus a Wi‑Fi hose timer can automate hand watering.
- Cross‑brace if windy: Add an extra diagonal brace or angle brackets to resist racking on gusty days.
- Think airflow: Pair the roof vent with a small exhaust fan. Options here: solar greenhouse fans.
Upgrades That Actually Help
Small, focused add‑ons increase yields and reduce faff without overcomplicating your setup.
- Automatic vent opener – prevents 45°C heat spikes on workdays.

Automatic Greenhouse Window Opener Solar Heat Sensitive Vent | Temperature Responsive Mechanism, Enclosure Frame Fit, Garden Structure Use, Thermal Response Hardware
$39.79 on Amazon - Removable shade cloth – keeps lettuce from bolting in January.
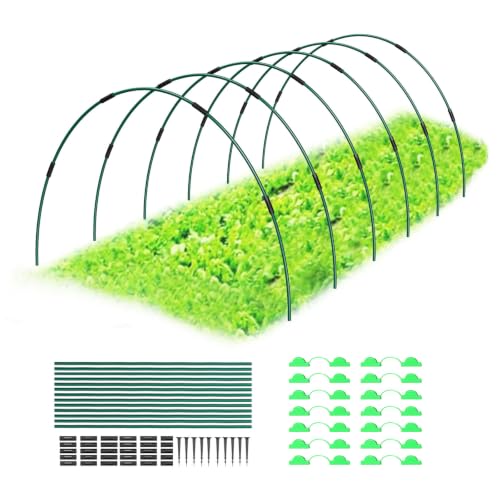
30Pcs Garden Hoops for Raised Beds, 6 Sets of 8.5 FT Long Garden Hoops, Rust-Free Fiberglass Greenhouse Hoops Grow Tunnel for Netting, DIY Plant Support Garden Stakes for Row Cover
$29.99 on Amazon - Sturdy metal shelving – stable trays = better germination and airflow.

7 Tier Metal Plant Stand on Wheels, Flower Pot Holder Shelf Indoor Outdoor | 135cm Tall, Sturdy Corner Planter Display Rack, Planter Display Shelving Unit for Patio Balcony Garden, Holds 8 Pots
$17.99 on Amazon - Misting kit with timer – reliable humidity for cuttings and summer seedlings. For full control, see high‑pressure misters.

Upgraded Automatic Drip Irrigation Kit Watering System for Potted Plants, Houseplants Greenhouse Watering Equipment with DIY Programmable Timer, USB LED Display & Large Capacity Battery (Green)
$53.99 on Amazon
Cold nights in the south? Compare heaters & thermostats and consider an all‑in‑one controller if you’re scaling up.
Common Problems and Easy Fixes
- Overheating by lunchtime: Fit an auto vent opener, add 30–50% shade cloth, and crack the door. A small solar fan pulls hot air up and out.
- Condensation dripping on seedlings: Increase morning airflow; space trays; consider a narrow oscillating fan on low.
- Panels buzzing in wind: Re‑seat capping, add anti‑dust tape, and run a thin bead of UV‑safe clear sealant along suspect joins.
- Whitefly and fungus gnats: Hang yellow sticky cards and water earlier in the day. If it’s chronic indoors, see our gnat control system.
FAQs – Lean‑To Polycarbonate Greenhouses in Australia
- Will a lean‑to overheat in Aussie summer?
It can if unvented. Choose a kit with a roof vent, add an auto‑opener, and use 30–50% shade from December–February. East or north‑east walls run cooler than west. - Is 4 mm polycarbonate enough?
For seed starting and mild zones, yes. For winter cropping, exposed sites, or southern states, 6–10 mm twin‑wall moderates temps better. - How do I anchor to brick?
Use suitable masonry anchors into sound brick (not mortar joints) and fix the base to concrete or mortared pavers. Always square the frame before drilling. - Do I need council approval?
Often not for small structures, but setbacks and easements can apply. Check your local council before ordering. - Can I connect gutters to a tank?
Yes. Many lean‑tos accept clip‑on gutters; run to a slimline tank with a first‑flush diverter. Pair with a drip kit for benches. - Glass vs polycarbonate?
Glass looks classic but is heavier and brittle. Polycarbonate is lighter, safer, insulates better, and copes with hail and transport. - What size suits a unit courtyard?
A 4×2 or 4×3 compact lean‑to. If you can manage 6×4, you’ll appreciate the extra headroom and shelf space. - How do I heat it in winter?
Small thermostatic heaters and thermal mass (water drums) help. Compare options in our heater guide. - Will coastal air corrode it?
Choose powder‑coated aluminium, rinse salt spray occasionally, and use stainless fixings where possible. - Can I automate everything?
Start simple: auto vent + misting timer. If you expand, look at an environmental controller for temp, humidity, and irrigation in one.
Final Word
If space is tight but your growing ambitions aren’t, a lean‑to polycarbonate greenhouse is the most cost‑effective upgrade you can bolt to a warm wall. Pick the footprint that matches your crops, anchor it properly, and add just two smart upgrades — an auto vent and seasonal shade — and you’ll be harvesting when your neighbours are still sowing. For a bigger step up, explore starter greenhouse systems and ventilation add‑ons.